Let Users Upload Images to Website Mmtuts
Handle user profile paradigm using Froala And PHP - Tutorial
In this tutorial, we will learn how to use Froala prototype uploader tool to upload and remove the images from a PHP server.
- Step one: Complete The Form HTML Lawmaking
- Froala Initialization Lawmaking Explanation
- Pace 2: Download The Froala PHP SDK
- Step iii: Upload And Store Images From Your Device To The Server
- Display The Uploaded Image Instead Of The Placeholder Epitome When A Page Is Refreshed
- Step four: Upload Images From URL To The Server
- Step 5: Setup Image Managing director
- Step half dozen: Delete Images
- 6.ane: Delete Images From Image Popup Card
- 6.two: Delete Image from The ImageManager
- Step 7: Image Validation
- 7.1: Paradigm Validation On The Customer-side
- 7.2: Prototype Validation On The Server-side
- Download The Total Lawmaking
- Step eight: Handling Errors While Uploading Images
- Step 9: Resize Images
- 9.1: Resize Images On The Client-side
- 9.2: Resize Images On The Server-side
- Step x: Upload Images To S3
- Pace 11: Add A Reach Text Editor To Your Form
Go Started
Following the go started guide, yous should now have created an index.php file with the following code:
<!DOCTYPE html> <html lang="en"> <head> <meta charset="UTF-8"> <meta http-equiv="10-UA-Compatible" content="IE=edge"> <meta proper noun="viewport" content="width=device-width, initial-scale=1.0"> <title> Froala used as image input <title> <!-- Stylesheets--> <link rel="stylesheet" href="css/froala_editor.min.css"> <link rel="stylesheet" href="css/plugins/image.min.css"> <link rel="stylesheet" href="css/plugins/image_manager.min.css"> </head> </body> <!-- HTML--> <div form="course-group"> <label for=" ">Upload Photo<label> <figure> <img id="logo" src="https://i.ibb.co/g9gGYPX/avatar-g177d581fb-640.png" alt="User placeholder" height="100"> <figcaption>Click on the above image to edit or replace</figcaption> </figure> </div> <!--JS Script--> <script src="js/froala_editor.min.js"> </script> <script src="js/plugins/paradigm.min.js"> </script> <script src="js/plugins/image_manager.min.js"> </script> <script> const editor = new FroalaEditor( '#logo',{ pluginsEnabled: ['epitome', 'imageManager'], //image popup buttons imageEditButtons: ['imageReplace', 'imageRemove'], //Buttons for the popup bill of fare which appears on imageReplace button click imageInsertButtons: ['imageBack', '|', 'imageUpload', 'imageByURL', 'imageManager'], } }); </script> </trunk> </html>
Step i: Consummate The Form HTML Lawmaking
In the code above nosotros take added the image element only. To plow this into a profile form case, allow's add a first name, terminal proper noun, and gender input fields. And let'south add the Bootstrap stylesheet to style the class elements.
The folders structure
And the alphabetize.php code is
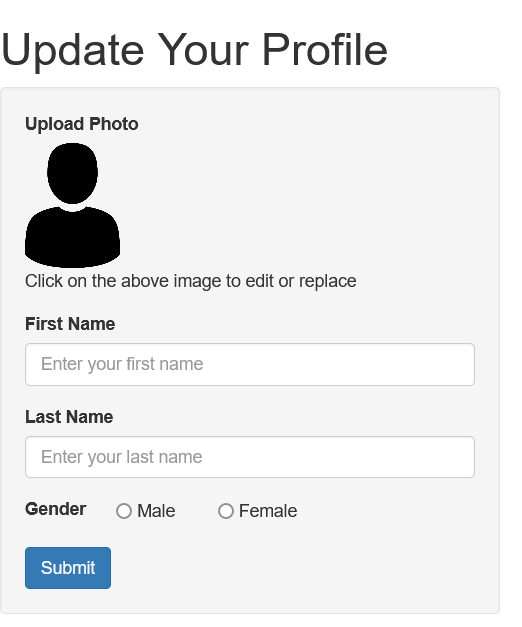
<!DOCTYPE html> <html lang="en"> <head> <meta charset="UTF-eight" > <meta http-equiv="X-UA-Compatible" content="IE=edge"> <meta name="viewport" content="width=device-width, initial-scale=1.0"> <title>Froala used every bit image input</title> <!-- Stylesheets--> <link rel="stylesheet" href="css/froala_editor.min.css"> <link rel="stylesheet" href="css/plugins/prototype.min.css"> <link rel="stylesheet" href="css/plugins/image_manager.min.css"> <link rel="stylesheet" href="https://maxcdn.bootstrapcdn.com/bootstrap/3.three.half dozen/css/bootstrap.min.css"> </caput> <body> <h1>Update Your Profile</h1> <!-- start instance --> <div class="well" style="max-width: 400px;"> <form action="/person.php" method="post"> <div class="course-group"> <label for=" ">Upload Photograph <label> <figure> <img id="logo" src="https://i.ibb.co/g9gGYPX/avatar-g177d581fb-640.png" alt="User placeholder" height="100"> <figcaption>Click on the above image to edit or replace</figcaption> </figure> </div> <div class="class-group"> <label for="firstname">Kickoff Name</characterization> <input course="form-command" type="text" name="firstname" placeholder="Enter your first name"> </div> <div class="class-grouping"> <label for="lastname">Final Name</label> <input class="grade-control" type="text" name="lasttname" placeholder="Enter your last name"> </div> <div> <div class="form-group"> <label>Gender</label> <label class= "checkbox-inline"> <input type="radio" proper noun="gender id=" male" value="male"> </label> <label course="checkbox-inline"> <input type="radio" proper name="gender" id="female" value="female"> </label> </div> <input blazon="submit" class="btn btn-master" value="submit"> </form> </div> <!--stop example--> <!--JS Script--> <script src="js/froala_editor.min.js"> </script> <script src="js/plugins/image.min.js"> </script> <script src="js/plugins/image_manager.min.js"> </script> <script> const editor = new FroalaEditor('#logo',{ pluginsEnabled: [ 'image', 'imageManager'], //paradigm popup buttons imageEditButtons: ['imageReplace', 'imageRemove'], //Buttons for the popup menu which appears on imageReplace button click imageInsertButtons: ['imageBack', '|', 'imageUpload', 'imageByURL', 'imageManager'], } }); </script> </body> </html> And if you open the alphabetize.php file in your browser, you should be able to see:
Froala Initialization Code Explanation
Permit's dig deeper into the Froala initialization code.
/** The Editor initialization code **/ <script> const editor = new FroalaEditor( '#logo',{ pluginsEnabled: [ 'image', 'imageManager'], //image popup buttons imageEditButtons: ['imageReplace', 'imageRemove'], //Buttons for the popup menu which appears on imageReplace button click imageInsertButtons: ['imageBack', '|', 'imageUpload', 'imageByURL', 'imageManager'], } }); </script> The FroalaEditor constructor function accepts iii arguments:
- The selector of the element that you desire to initialize Froala at.
- Options object.
- A callback office that will exist called once Froala is initialized.
Permit'south take a expect at the choice we are using:
- pluginsEnabled:
Froala editor has +thirty plugins. In this option you can specify which plugins will be enabled, other plugins volition be disabled. Since we are using Froala for prototype uploading, we will need to enable Image and Epitome Director plugins only.
- imageEditButtons:
In this option y'all can specify the buttons that will announced when the image is clicked, for our employ case, nosotros demand the upload and remove prototype buttons which are named 'imageReplace' and 'imageRemove' respectively.
- imageInsertButtons
In this option, you lot tin specify the buttons that will be displayed at the image insert popup bill of fare. You tin can specify hither the options for uploading images as well as a back button to close the popup menu.
By initializing Froala editor equally in the above code, you should now be able to see replace and remove options when you click on the image.
Footstep 2: Download The Froala PHP SDK
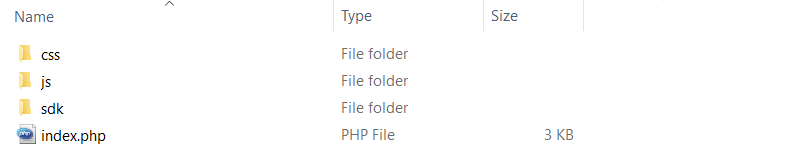
Download the Froala PHP SDK using your preferred method. For this demo, We installed the SDK library using the direct link. And then, we created a new binder at the project base folder and extract the SDK files into that folder.
Annotation: Froala PHP SDK requires FileInFo and Imagick extensions to exist enabled. The Imagick extension is required for resizing images. Since we will non resize images in this example, I removed information technology from the requireDependencies function in the lib/FroalaEditor.php file to not go an fault if the extension is not enabled on the server.
Footstep three: Upload And Shop Images From Your Device To The Server
For this footstep, we need:
- Determine the path of the folder that we volition use to store the user image. For this demo purpose, nosotros will store the image at storage\user1\images folder.
- Prepare the
imageUploadURLFroala option to the path of a PHP file that will handle the image upload asking from the client. this will be a new PHP file that, in this demo, we will create at the base folder of the project with the proper noun upload.php. - Set the request type in the
imageUploadMethodpick
<script> /** The Editor initialization lawmaking **/ const editor = new FroalaEditor( '#logo',{ pluginsEnabled: [ 'epitome', 'imageManager'], //paradigm popup buttons imageEditButtons: ['imageReplace', 'imageRemove'], //Buttons for the popup menu which appears on imageReplace push button click imageInsertButtons: ['imageBack', '|', 'imageUpload', 'imageByURL', 'imageManager'], //Set the request type imageUploadMethod:'Mail service', //Set the image upload URl. imageUploadURL:'upload.php' }); </script> iv. In the upload.php file, we take to return an object that has a link belongings that is the URL of the uploaded image. Froala SDK makes this quite simple by just calling FroalaEditor_Image::upload and passing the image storage path as the first argument.
<?php /** upload.php file **/ require 'sdk/lib/FroalaEditor.php'; // Store the epitome. attempt{ $response = FroalaEditor_Image::upload('/fro-demos/img/storage/user1/images/'); //Set the request type repeat stripslashes(json_encode($response)); } take hold of(Exception $e) { http_response_code(404); ?> Note: For the uploaded paradigm to be stored correctly, the server should have the rights to write in the uploads binder. Additionally, you should check that the uploaded image is publicly attainable in the browser so it can be displayed to your users.
Now, if you lot open the form in the browser and upload an image from your calculator, information technology should be stored at storage\user1\images folder.
Display Uploaded Image Instead Of The Placeholder Image When The Page Is Refreshed
We take two cases:
- Shop the last uploaded image only and each time a new image is uploaded it will replace the old one. In this example, all nosotros need to do is to cheque if the storage binder has an image to brandish. If information technology doesn't accept any image, nosotros will display the placeholder image.
- Allowing users to shop multiple images in the storage folder. In this example, you lot'll need to store also the uploaded image filename to use in displaying the image afterward, in a real application you can store the prototype filename in the users tabular array in the database, but for this demo we volition store it in JSON file at storage\user1\images\image_name.txt.
In this toturial we will implement the second case. Open the upload.php file and add the post-obit line to store the uploaded image filename at the image_name.txt file
//store image link in a file file_put_contents( $_SERVER['DOCUMENT_ROOT'] . '/fro-demos/img/storage/user1/images/image_name.txt', $response); The full code:
<?php /** upload.php file **/ require 'sdk/lib/FroalaEditor.php'; // Store the paradigm. try { $response = FroalaEditor_Image::upload('/fro-demos/img/storage/user1/images/'); $response = json_encode($response); //shop prototype link in a file file_put_contents( $_SERVER['DOCUMENT_ROOT'] . '/fro-demos/img/storage/user1/images/image_name.txt', $response); //return the response echo stripslashes($response); } take hold of ( Exception $e) { http_response_code( 404); } ?> Now, if you open the index.php file in your browser and upload an image from your computer, it should be stored at storage\user1\images and the filename is written in storage\user1\images\image_name.text file
In this instance, when the page is loaded and the image_name.text file has an image name, then the server should display that prototype, otherwise, the placeholder image should exist displayed. The post-obit code is just doing this.
Open the index.php file and replace the prototype display department code with this one
<div class="class-group"> <label for=" " >Upload Photo< /label > <figure > <?php $project_folder='/fro-demos/img'; $file_path=$_SERVER['DOCUMENT_ROOT'] . $project_folder . '/storage/user1/images/image_name.txt'; $response = file_get_contents($file_path); if($response === false || empty($response)){ $img_src="https://i.ibb.co/g9gGYPX/avatar-g177d581fb-640.png"; } else { $response=json_decode($response); { $img_src=$response->link; } ?> <img id="logo" src="<?php repeat $img_src; ?>" alt="User placeholder" elevation="100" > <figcaption >Click on the in a higher place image to edit or supersede< /figcaption> </figure> </div>
Step 4: Upload Images From URL To The Server
To upload images from an external URL, you should set the imageCORSProxy choice.
Proxy server is needed for reading images inserted by URL and uploading them to your server. For testing, you tin can:
- Set the imageCORSProxy option to 'https://cors-anywhere.herokuapp.com'
- Open the link https://cors-anywhere.herokuapp.com/corsdemo on a new page
- Click on "Request temporary admission to the demo server" button
The message "Y'all currently have temporary access to the demo server." should announced and if you lot return to your upload form, you will be able to upload images from URLs
<script> /** The Editor initialization code **/ const editor = new FroalaEditor( '#logo',{ pluginsEnabled: [ 'image', 'imageManager'], //image popup buttons imageEditButtons: ['imageReplace', 'imageRemove'], //Buttons for the popup bill of fare which appears on imageReplace button click imageInsertButtons: ['imageBack', '|', 'imageUpload', 'imageByURL', 'imageManager'], //Prepare the request type imageUploadMethod:'Mail', //Set the image upload URl. imageUploadURL:'upload.php' //Set Proxy to upload images from a URL imageCORSProxy:'https://cors-anywhere.herokuapp.com', }); </script>
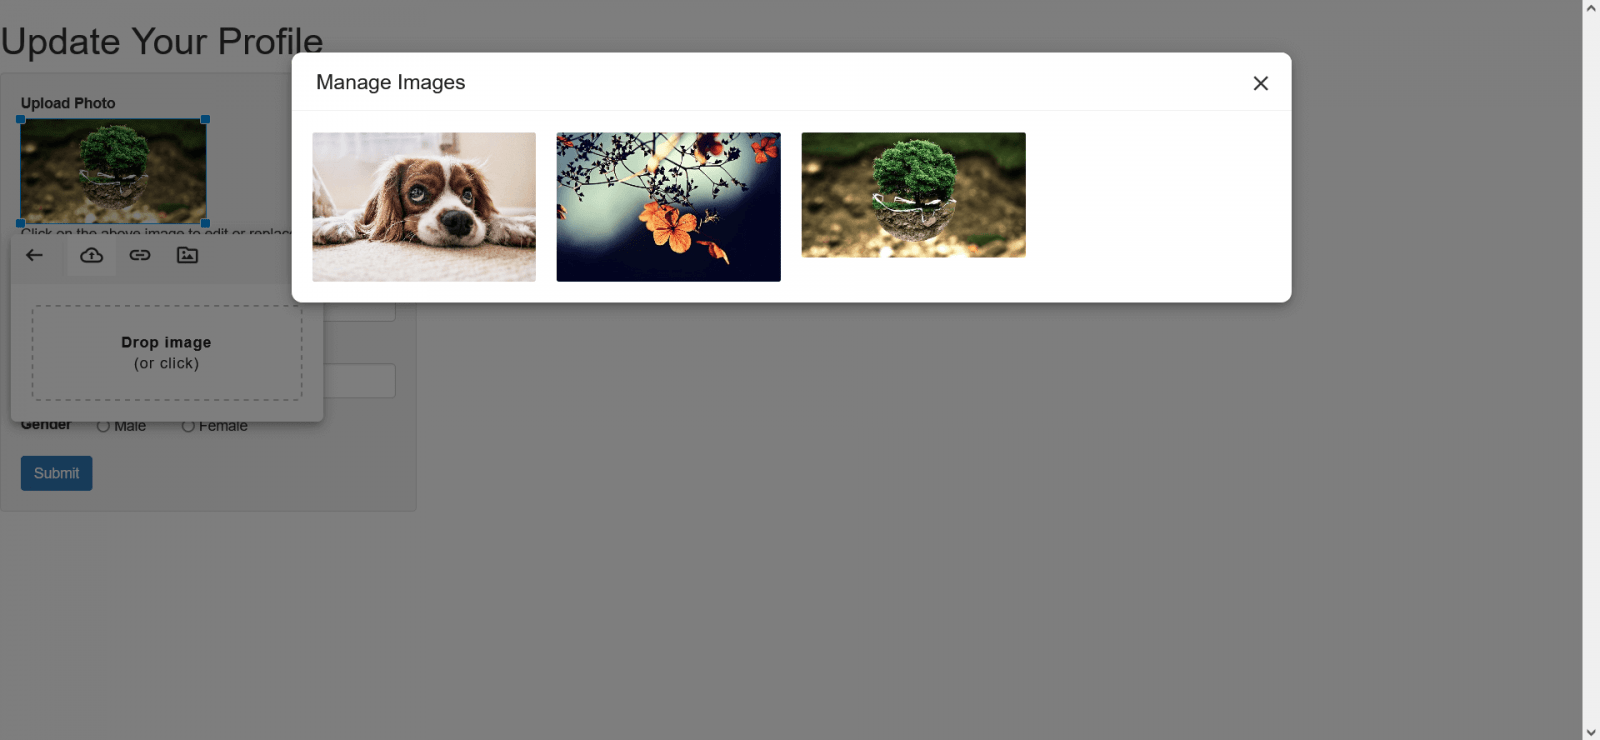
Stride 5: Setup Image Director
With Froala, an image manager is already created for you. You just need to tell Froala which images to display. To do this yous have to fix the imageManagerLoadURL selection. The editor volition send an HTTP request to the imageManagerLoadURL and the server should reply with an assortment of images objects.
For implementing this, we will create a new PHP file called image_manager.php
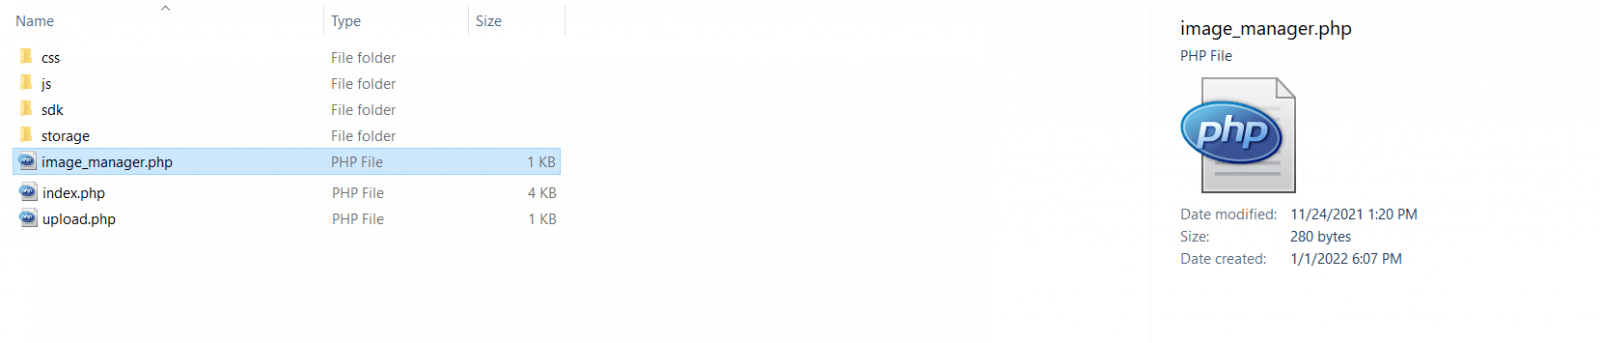
Ready imageManagerLoadURL option to the path of that file
<script> /** The Editor initialization lawmaking **/ const editor = new FroalaEditor( '#logo',{ pluginsEnabled: [ 'image', 'imageManager'], //paradigm popup buttons imageEditButtons: ['imageReplace', 'imageRemove'], //Buttons for the popup menu which appears on imageReplace button click imageInsertButtons: ['imageBack', '|', 'imageUpload', 'imageByURL', 'imageManager'], //Fix the request type imageUploadMethod:'POST', //Set the image upload URl. imageUploadURL:'upload.php' //Prepare Proxy to upload images from a URL imageCORSProxy:'https://cors-anywhere.herokuapp.com', //Gear up the paradigm delete URL. imageManagerDeleteURL:'delete_image.php', //Gear up the paradigm upload URL. imageManagerLoadURL: 'image_manager.php', }); </script> In the image_manager.php file you need just to call the FroalaEditor_Image::getList function and laissez passer the image storage path every bit the first statement. The Froala SDK will return an assortment of the images objects stored in that folder. All you demand to practise is to return the images array back to the client.
<?php /** image_manager.php file **/ require 'sdk/lib/FroalaEditor.php',; endeavour { // Get list of the images. $response = FroalaEditor_Image::getList('/fro-demos/img/storage/user1/images/'); // return the list of the images to the cleint. echo stripslashes (json_encode($response)); } catch ( Exception $e) { http_response_code( 404); } ?> Now if you lot click on image manager button, yous should exist able to view your images
- Set the
imageManagerLoadMethodoption if you desire to ship a different HTTP request types rather thanGet. - Paradigm Manager can brandish images in categories as well. Check the complete imageManager options list to know how to practice that.
When you hover over an epitome inside the Paradigm Manager, two buttons are shown one is for replacing the profile image with the selected paradigm and the other is for removing the selected image.
The kickoff push is for replacing the contour image and information technology works on the client-side out of the box. But in our demo, we accept to update the image_name.txt file when the selected image is replaced to continue the newly selected image displayed when the page is reloaded.
To do this we need to ship an HTTP asking to the server when the image is replaced which will shop the selected epitome link at the image_name.txt file. Froala doesn't have an option for doing this, but Froala has a diverseness of events that can help in doing custom requirements.
In our case, we will use the Froala prototype.replaced event to ship an HTTP asking to the server. At the following code inside the options object of Froala initializing code
/** The Events object of the Editor initialization code **/ events: { 'prototype.replaced': function ($img, response ){ //this is the editor example. console.log(this); //get the epitome link var imgLink = $img[0].src.supervene upon('http://localhost', ''); //Transport HTTP request to the server var request=new XMLHttpRequest(); //set request type and target url request.open up('POST', window.location.pathname+'store_image_link.php', true); //Set the information that volition exist sent along with the request var data=new FormData(); //transport the link of the replaced image that needs to get stored data.append('img_link', imgLink); //send the asking with the data request.onload=function() { if (this.status >= 200 && this.status < 400) { //request Success! console.log ('Image successfully stored.'); } else { //Nosotros reached our target server, but it returned an error var err = this.response; console.log ('Paradigm delete problem: ' + JSON.stringify(err)); } }, //On request failure asking.ship = (data) request.onerror = part() { // There was a connection mistake of some sort var err = this.response; panel.log ('Image delete trouble: ' + JSON.stringify(err)); }; } } It volition send an HTTP request to the store_image_link.php file which we volition create at the project base folder and it will comprise the post-obit lawmaking to receive the replaced image link and store it inside the text file.
<?php /** store_img_link.php file **/ try { //Receive the paradigm link $link = json_encode($_POST['img_link']); //Store image link in a file file_put_contents($_SERVER['DOCUMENT_ROOT'] . '/fro-demos/img/storage/user1/images/image_name.txt', $link); //Render success message to the client. echo stripslashes(json_encode('Success')); } catch (Exception $e) { { http_response_code(404); } ?> Since image.replaced event is triggered too when the image is uploaded with the other uploading options, nosotros can remove storing image filename code from the upload.php file. Its contents will be:
<?php /** upload.php file **/ try { //Receive the image link $link = json_encode($_POST['img_link']); //Store image link in a file file_put_contents($_SERVER['DOCUMENT_ROOT'] . '/fro-demos/img/storage/user1/images/image_name.txt', $link); //Render success message to the customer. echo stripslashes(json_encode('Success')); } catch (Exception $east) { { http_response_code(404); } ?> Nosotros are now storing the paradigm link directly non as a link belongings. so we demand to fromeplace the following code from the index.php file
$response = json_encode($response); $img_src = $response->link; With
$img_src = json_encode($response); Displaying the contour image when the page is reloaded should now be working correctly even if information technology is replaced using the Paradigm Manager.
Step 6: Delete Images
Deleting images is washed by sending an HTTP asking to the server which volition utilize the Froala SDK to delete the image and return a successful response to the client. Users can delete images in ii means
6.i: Delete Images From Epitome Popup Carte du jour:
Since we don't have an choice to send a delete request when a user clicks the delete image push button from the image popup card, nosotros will use the image.beforeRemove event to send the asking.
If the image is successfully deleted from the server, the client volition replace the electric current image with the placeholder image and alert the user that epitome is successfully deleted.
In the Froala initialization options parameter, add the following code to the events object
/**Adding prototype.beforeRemove event to the Editor initialization code **/ //delete paradigm from the server 'epitome.beforeRemove': office ($img){ //become the image link var imgLink = $img[0].src.replace('http://localhost', ''); //Send HTTP request to the server var request=new XMLHttpRequest(); //set up request blazon and target url request.open up('Postal service', window.location.pathname+'store_image_link.php', true); //Prepare the data that will be sent along with the request var information=new FormData(); //ship the link of the replaced image that needs to get stored information.suspend('src', imgLink); //send the asking with the data request.ship(information); request.onload = function() { if (this.status >= 200 && this.condition < 400) { //Success! const placeholder = certificate.getElementById('logo'); placeholder.src "https://i.ibb.co/g9gGYPX/avatar-g177d581fb-640.png"; //Display alarm to the user warning ('Image was successfully deleted'); } else { //We reached our target server, but it returned an error var err = this.response; panel.log ('Image delete problem: ' + JSON.stringify(err)); } }; //On asking failure asking.onerror = part() { // There was a connection fault of some sort var err = this.response; console.log ('Image delete problem: ' + JSON.stringify(err)); }; //return imitation to foreclose Froala from removing img src earlier the HTTP request is completed render false; }, It will send an HTTP request to the delete_image.php file which nosotros will create at the projection base folder and it will contain the following lawmaking to delete the epitome from the server past calling FroalaEditor_Image::delete and set the image link every bit the first argument. Information technology also will delete the image link from the image_name.txt file.
<?php /** delet_image.php file **/ endeavor { //Receive the image link $link = json_encode($_POST['img_link']); //Delete image link from a file file_put_contents($_SERVER['DOCUMENT_ROOT'] . '/fro-demos/img/storage/user1/images/image_name.txt', null); //Return success message to the client. echo stripslashes(json_encode('Success')); } catch (Exception $due east) { { http_response_code(404); } ?>
6.2 Delete Images From Prototype Manager
For deleting images from the ImageManager, Froala provides three options imageManagerDeleteURL, imageManagerDeleteMethod, and imageManagerDeleteParams. Nosotros will use the imageManagerDeleteURL selection to send an HTTP request to the server when an image is deleted. We volition the HTTP request to the same delete_image.php file that we take used in pace vi.1 to delete the selected image from the server. Since ImageManager has multi-images, nosotros need to check if the epitome that will exist deleted is the same i that is used as the contour paradigm before removing the image link from the image_name.txt file.
1. Set the imageManagerDeleteURL choice to delete_image.php
// Set the image managing director delete URL. imageManagerDeleteURL: 'delete_image.php', 2. Edit delete_image.php to get the active profile image link and check if it is the aforementioned as the image that will be deleted link. If information technology is then delete the paradigm link from the image_name.txt file.
<?php /*** deleted_image.php file ***/ require 'sdk/lib/FroalaEditor.php',; try { //go the epitome to be deleted link $deleted_img_link = $_POST('src'); //Delete paradigm from the server $response = FroalaEditor_Image::delete($deleted_img_link); //Cheque the image link is the contour paradigm link or not //get the used profile epitome $profile_img_link = file_get_contents( $_SERVER['DOCUMENT_ROOT'] . '/fro-demos/img/storage/user1/images/image_name.txt'); //if a contour prototype is used and information technology is the i that volition be deleted if($profile_img_link !== false && !empty($profile_img_link) && json_decode($profile_img_link) === $deleted_img_link); //Delete the image link from the txt file file_put_contents($_SERVER['DOCUMENT_ROOT'] . '/fro-demos/img/storage/user1/images/image_name.txt', goose egg) { //Return a success message to the client. file_put_contents(json_encode('Success')) } catch(Exception $e) { http_response_code( 404); } ?> Note: the image to exist deleted link will be available at $_POST['src'] global variable.
3. Finally, The client should supersede the profile image with the placeholder image If the deleted image is the same every bit the profile image. To do this we will apply the imageManager.imageDeleted event. This event's first parameter is the response of the server to the request sent past imageManagerDeleteURL option which is the response nosotros return in the delete_image.php script.
Edit the delete_image.php file to return a response indicating if the image that will be deleted is the profile image or not.
<?php /*** delet_image.php file ***/ crave 'sdk/lib/FroalaEditor.php',; try { /** prepare a flag to point if the image to be deleted is the contour image**/ /** Used when deleting image from image managing director **/ $is_profile_img = imitation; //go the image to exist deleted link $deleted_img_link = $_POST['src']; //Delete image from the server $response = FroalaEditor_Image::delete($deleted_img_link); //Check the image link is the profile prototype link or not //get the used profile prototype $profile_img_link = file_get_contents($_SERVER['DOCUMENT_ROOT'] . '/fro-demos/img/storage/user1/images/image_name.txt'); //if a profile prototype is used and information technology is the one that volition be deleted if($profile_img_link !== imitation && !empty($profile_img_link) && json_decode($profile_img_link) === $deleted_img_link); //this is the image used for profile $is_profile_img = truthful; //Delete the image link from the txt file file_put_contents($_SERVER['DOCUMENT_ROOT'] . '/fro-demos/img/storage/user1/images/image_name.txt', null) } //Render the response to the client. echo stripslashes(json_encode(["is_profile_img"=>$is_profile_img])); } take hold of(Exception $eastward) { http_response_code( 404); } ?> In the imageManager.imageDeleted effect check if the response is indicating that the image to exist deleted is the profile paradigm, if it is, replaces it on the grade with the placeholder image.
//delete image from the Image Manager 'imageManager.imageDeleted': function (response) response = JSON.parse(response); if(response.is_profile_img'){ //replace profile image with the placeholder image const placeholder = certificate.getElementById('logo'); placeholder.src = "https://i.ibb.co/g9gGYPX/avatar-g177d581fb-640.png"; } },
Step 7: Image Validation
7.one: Paradigm Validation On The Client-side
//Validation //set image allowed types imageAllowedTypes: ['jpeg', 'jpg', 'png'] // Ready max epitome size to 10MB. imageMaxSize: 1024 * 1024 * 10, Annotation: Even if you are using client-side validation, server-side validation is also recommended.
7.2: Prototype Validation On The Server-side
In footstep 3, we have used the FroalaEditor_Image::upload method to upload the epitome to the server. This method accepts a 2nd optional parameter which is an uploading options array.
Prototype extension and image mime type validation tin exist washed on the server using Froala SDK equally described in this reference.
Other validations types, east.m. Image size validation can be done by assigning a custom part to the "validation" array.
In our demo, we would allow uploading 'jpeg', 'jpg', and 'png' images but. To practice that we volition edit upload.php file
<?php /**** upload.php file***/ require 'sdk/lib/FroalaEditor.php',; try { $options = array( 'validation' => array( 'allowedExts' => array('jpeg', 'jpg', 'png'), 'allowedMimeTypes' => assortment('paradigm/jpeg', 'image/pjpeg', 'epitome/10-png', 'prototype/png') ) ); // Store the image. $response = FroalaEditor_Image::upload(/fro-demos/img/storage/user1/images/', $options'); //return the response repeat stripslashes(json_encode($response)); } take hold of(Exception $due east) { http_response_code( 404); } ?>
Download The Tutorial Total Code
We achieve the stop of our tutorial. Yous tin can download the full lawmaking form GitHub and go started immediately. If you like this tutorial please star the GitHub repository, this will encourage us to create more tutorials.
Still, our tutorial code ends here, we don't cover all what Froala is capable of helping you lot in. Some of what we didn't cover in the downloaded code is discussed beneath.
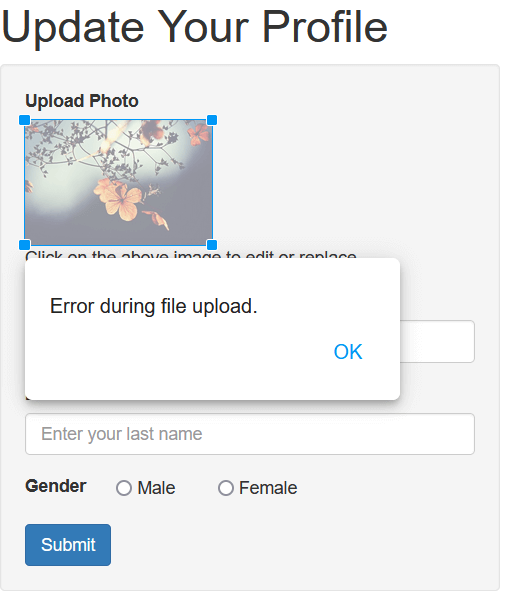
Step 8: Handling errors while uploading Images
Past default, Froala displays an error message when an error happens during paradigm upload just if you want to customize how or what is displayed, yous can use image.fault and imageManager.fault events to do and so.
Step nine: Resize Image
9.one: Resize Image On The Client-Side
Froala allows users to resize the profile prototype while they are viewing information technology on the browser, but this doesn't touch the concrete size of the epitome. Unless you use Froala events or other ways to send the image size to the server, the epitome volition render to its original size one time yous reload the page.
9.2: Resize Prototype On The Server-Side
Froala SDK will assistance you to automatically resize the uploaded image to a certain size. Follow this reference. to accomplish that.
Note: Brand sure that PHP Imagick extension is enabled on your server or an error will be will thrown.
Step 10: Upload Images To S3
Froala SDK provides different methods to handle uploading images to S3 which will base your product integration with S3 fast and like shooting fish in a barrel. Uploading images to S3 is out of the scope of this tutorial, only yous can utilize this reference to guide yous implementing this.
Footstep 11: Permit Users To Add A Rich Content Profile Description
It's common to accept a text-area field for allowing users to enter a description about their profile. Using Froala WYSIWYG editor you can permit your users to improve their description content by allowing them to style and format their content, Moreover, your users will be able to add together videos, images, tables, and links to become a better profile layout and description. All this could be achieved with the same Froala script we have used for image uploading, which ways there are no more libraries or resource to take care of. and it is easy to be added to your form.
1. Add together the normal textarea field
< div class="form-group"> <label for="description" >Description< /label > <textarea course="course-command" id="description" name="description" placeholder="Enter a profile clarification" > </textarea> </div> 2. Initialize a new editor on information technology.
new FroalaEditor( '#description'); 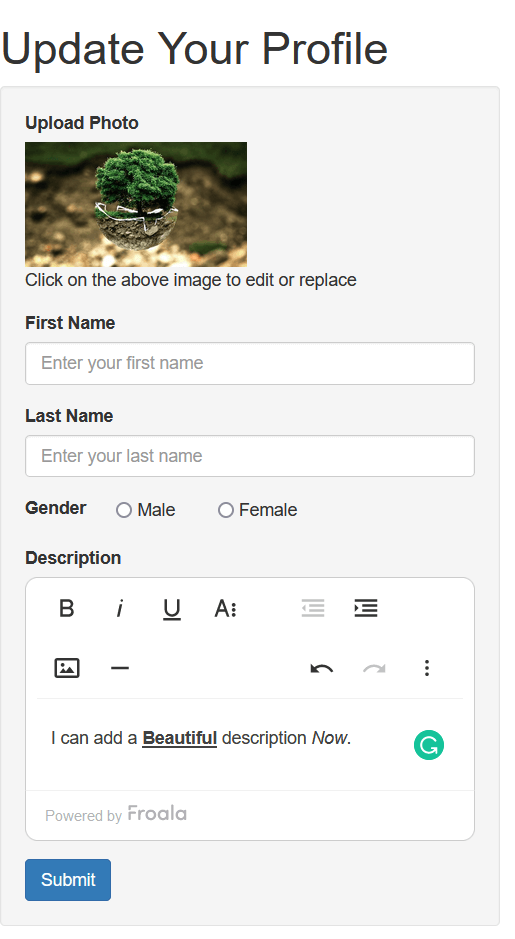
Source: https://froala.com/image-uploader/handle-user-profile-image-php-tutorial/
0 Response to "Let Users Upload Images to Website Mmtuts"
Post a Comment